Saturday, February 19, 2011

Tomato Soup with Bacon and Blue Cheese

I first had this soup at a church banquet.  It was creamy, flavorful, soothing, and wonderful.  I was quite surprised to learn that it had blue cheese in it since the strong flavor of the blue cheese wasn't detectable.  My husband, who dislikes blue cheese couldn't taste the cheese either.  The cheese, however, does add creaminess to the soup.  I hope you all enjoy this recipe as much as I do.  It combines four of my favorite ingredients - tomato, bacon, blue cheese, and garlic!  Enjoy!

Tomato Soup with Bacon and Blue Cheese
2 tbsp butter
1 leek (green and white parts)
1 carrot
4 cloves garlic, coarsley chopped
1 tsp salt
1/2 tsp black pepper
48 oz crushed tomatoes
32 oz chicken broth
5-6 slices bacon, cooked and crumbled
4 oz blue cheese
6 tbsp heavy cream
6 leaves basil
1 tbsp fresh parsley, chopped


Coarsely chop the carrots and leeks.
Melt butter in a stock pot or dutch oven over medium heat.  Add leeks and carrots and cook until carrots start to get tender.  Add in the garlic and cook until some of the garlic turns a light tan. 


Add the chicken stock, tomatoes, salt, pepper, and bacon.   

Bring to a boil and let simmer for 30 minutes to 1 hour.  You want to reduce the broth a little, but make sure not to reduce it too much.  I let it reduce about 1/2 inch .

Remove from heat and add the basil, parsley, cream, and blue cheese. 

Using a "boat motor," blend the soup until creamy and there are no chunks remaining in the soup.  You can also use a food processor or blender to cream the soup.  If you do this, cream the soup in multiple small batches.  Return to the heat and heat just until the soup is simmering.  Serve with any bread of your choice.  Enjoy!

One final note:  I used my home grown peeled, seeded, crushed tomatoes that I had frozen in the freezer.  The original recipe calls for 3 lbs of fresh tomatoes.  If you choose to use fresh tomatoes, the recipe calls for peeling, seeding, and quartering them, placing them on a baking pan, and seasoning with some salt and pepper.  You are to then roast them in a 400 degree oven for about 30 minutes.  I'm not sure this is necessary as the soup I made tonight tasted the same as the soup made with the roasted tomatoes.  If I didn't have my own tomaotes, I would have used half Muir Glen's fire roasted crushed tomatoes, and half regular crushed canned tomatoes.  The type of tomatoes you use is your choice and what makes cooking so fun! 

Sunday, January 30, 2011

Sweet and Sour Meatballs

This is my mother-in-law's recipe that she created for a Cattlewoman's cook off.  She didn't win, but I think it is pretty wonderful.  I really like this recipe because it doesn't have any bell peppers or tomato products in the sauce.  Sorry I don't have any pictures for this recipe.  Enjoy!

Sweet and Sour Meatballs
For the meatballs:
1.5 lbs ground beef, venison, or a mixture of the two
1 c bread crumbs
1 c milk
1 egg
1 medium onion, grated (this hides the onion from people who normally wouldn't eat it)
1 1/2 tsp salt
1 tsp black pepper
1 tsp mustard powder
1 tsp dried sage
1 1/2 tsp garlic powder (or if you have the minced garlic in a jar, then about 1 tbsp)
2 tbsp Worcestershire sauce

For the sauce:
1 c sugar (Splenda works perfectly if you want to cut back on calories or for diabetics)
3/4 c apple cider vinegar
2 c water
1 can (20 oz) crushed pineapple
1 tsp salt
water and cornstarch to thicken

Using a mixer (or your hands if you want), combine all the meatball ingredients and mix until all ingredients are evenly distributed.

I hate rolling the meatballs and frying all of them.  You can do this if you wish, but I prefer to bake the meat.  There are two ways I do this, depending on my level of ambition.  If I want to make actual meat"balls", I use a melon baller to make uniform balls, place them on a jelly roll sheet (the one with an edge), and bake them in a 375 degree oven until they are cooked through.  If I don't want to spend all the time making the balls, I evenly spread the meat mixture into a jelly roll pan, then cut 1 inch squares using a pizza cutter.  Leave the meat in the jelly roll pan to cook it, again in a 375 degree oven until it is cooked through.  The meatballs will then be meat squares, but the flavor doesn't depend on the shape of the meat!

In a dutch oven, or a large sauce pan, combine all the ingredients for the sauce and turn the heat on low.  Add the meatballs once the sugar is dissolved, cover, and let simmer for 1 hour.  Gently stir periodically, but be careful not to break apart the meatballs. About 10 minutes before serving, in a small bowl, mix about 2 heaping tbsp of cornstarch with enough water to make a thick liquid.  Slowly pour the cornstarch mixture into the sauce and gently stir.  Let it return to a simmer for about 10 minutes, or until the sauce is thicker.  Serve the sweet and sour meatballs over rice.  Enjoy!

Monday, January 3, 2011

Basil and Garlic Cream Sauce

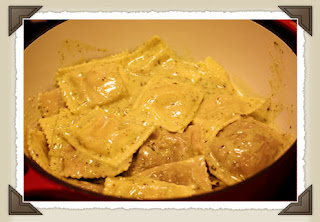
This sauce makes you want to close your eyes and pretend you are in a beautiful and expensive Italian restaurant somewhere in Italy.  You smell garlic, basil, sweet cream, and white wine.  Heaven in a pan!

This sauce is so easy to make, it just takes some patience.  I serve it over fresh store bought ravioli.  The flavor of the ravioli should go with garlic and basil, so feel free to experiment.  I especially like it on a sundried tomato and artichoke ravioli.  Enjoy!

Basil and Garlic Cream Sauce  (for Two)
10 basil leaves (You can use a few more if you want a stronger basil flavor.)
2 cloves garlic
1/3 c white wine
1 c heavy whipping cream
2 tbsp cold butter
salt and pepper to taste


In a blender, food processor, or using one of those small "boat motor" blenders, puree the basil, garlic, and wine until the basil and garlic is smooth.


Pour basil mixture into a small sauce pan along with the cream.  Turn the heat on low and let the mixture reduce by about 1/3, stirring occasionally.  This is where the patience comes in because this should take about 30-40 minutes.  Don't turn the heat up to speed up the process.  Let it simmer.  Let the flavors mingle.  Play on facebook while you wait.

When the sauce is reduced, remove it from the heat and let it set for a few minutes.  Then whisk in one tablespoon of butter at a time, letting the sauce absorb the butter before you add the next tablespoon.  Adding the cold butter a little at a time will allow the butter to be incorporated into the sauce without it separating into sauce and fat.  At this point, taste the sauce and add salt and pepper as you feel is needed. 


Pour sauce over cooked ravioli and savor the experience!  Enjoy!

Thursday, December 30, 2010

Thai Grilled Chicked with Cilantro Dipping Sauce


My family calls this dish "Green Chicken."  Maybe it is because the title is too long to say, or because it really is green.  The marinade for the chicken has cilantro and jalapeno pepper, along with garlic, fish sauce, sesame oil, and olive oil blended into a liquid, which is green.  When the chicken marinates in the liquid for any time, it takes on the greenish color.  Don't let the fish sauce turn you away from trying this recipe.  Many people aren't fans of fish sauce because of the smell right out of the bottle, but when you cook with it, the dish doesn't have a fishy flavor at all.  The fish sauce adds saltiness and a rich flavor to the dish.  Enjoy!

Thai Grilled Chicken with Cilantro Dipping Sauce
Marinade
1-2 Jalapeno peppers, seeded and ribs cut out
3 cloves Garlic
1/2 c Cilantro leaves and stems
2 tbsp Fish Sauce
1 tbsp Olive oil
1 tsp Sesame oil
1/2 tsp Salt
4 chicken breasts up to 2.5 lbs of chicken breast tenders (depending on number of people being served)

Dipping Sauce - for two people
6 tbsp Rice wine vinegar
1 tbsp sugar
1 1/2 tbsp water
1/2 tsp Red pepper flakes, divided
2 cloves Garlic, minced and divided
3 tbsp Cilantro (leaves and stems), finely chopped, and divided

Marinade and Meat

In a blender or food processor, combine all the marinade ingredients except the chicken.  One jalapeno will add hardly any heat to the meat.  Add more jalapeno if you want more heat on the chicken.  Process until all the jalapeno pepper and garlic is chopped and the liquid is fairly smooth.  Place the chicken and marinade in a gallon zip lock bag and let marinate for at least 4 hours, up to 6 hours.


There are two options for cooking the chicken - grilling or broiling.  I've tried this recipe both ways and my favorite way is to broil it.  Grilling it is fine, but I don't enjoy the flavor of the grilled cilantro.  Grill or broil the chicken on one side until it is tanned, then turn the meat over.  Cook it until the juices run clear.


Dipping Sauce
In a small sauce pan, combine the rice vinegar, sugar, and water.  If you are serving 3-4 people, double the sauce recipe.  Bring to a slow simmer just until all sugar is dissolved.  While this is cooking, prepare the remainder of the sauce. 

In each of two ramekins (I'm showing three because I'm making sauce for 3 of us), place 1 1/2 tbsp cilantro, 1/8 to 1/4 tsp (depending on heat tolerance) red pepper flakes, and one clove minced garlic.

Once the sugar is dissolved in the vinegar and the mixture is just starting to simmer, divide the liquid evenly between the ramekins.  I like to let the sauce set for about 10-20 minutes before serving it to allow the heat to be extracted from the red peppers, and all the flavors to mingle.  I usually let the sauce set while the chicken is cooking.  


 Place a sauce ramekin at each person's place setting.  Serve with the hot chicken.  I like to serve this dish with a green salad and ginger rice.  This is a great recipe to serve company - just make sure they like cilantro and that you adjust the amount of red pepper to each person's heat tolerance.  Enjoy!


Monday, December 20, 2010

Salmon with Smokey Lemon Aioli

Salmon is my absolute favorite seafood.  If I lived where I could get salmon every week, I would have it for dinner at least once a week.  Out of all the ways I fix salmon, this recipe is my absolute favorite.  I first had a version of this recipe when I was in college and was invited to an older couple's house for dinner.  Of course I didn't get the recipe, so I had to figure it out later.  This is my version of the recipe.  It is simple to fix, cooks quickly, and tastes heavenly.  Enjoy!

Salmon with Garlic and Lemon Ailoi
1 salmon filet
2/3 c mayonnaise (I prefer Best Foods, regular or reduced fat is fine)
3 gloves garilc
2 tbsp lemon juice (bottled for from a fresh lemon)
3/4 tsp smoked paprika (has to be smoked)
1 tbsp dill (dried is great to use)
1 tsp Mesquite garlic salt (if you don't have this, a hickory smoked salt would work, or just plain salt coupled with the smoked paprika is fine)
Dash black pepper
Optional spices : 1/4 tsp red pepper flakes, 1/2 tsp crushed fennel seed


In a small bowl, mix the mayonnaise, garlic, lemon juice, paprika, mesquite garlic salt (or salt), black pepper, and optional spices.  I like to let this set in the refrigerator for about 1-2 hours to allow the flavors to mingle.  If you don't have this time, 15-30 minutes will suffice.

Preheat oven to 425 degrees.  Lightly grease a broiler pan and place the salmon on it skin side down.  Spread all the aioli sauce over the salmon. 


Cook the salmon for about 25 minutes.  The sauce should be tanned, and the salmon should flake with a fork when it is done.  Serve while hot.


Another way I love to cook this salmon is grilled on a cedar plank.  To cook the fish on a cedar plank, you have to place the board in water for about 10 minutes.  Most directions say to let it soak for an hour.  That is fine and dandy when you are cooking a meat for a long period of time, but the salmon doesn't need more than 25 minutes to cook.  Letting the board soak for about 10 minutes will keep it from burning through, but still allow it to start smouldering and give the fish flavor.  After soaking the board, place the fish on the board and apply the sauce.  Cook the fish in a medium heat grill for about 25 minutes, or until the sauce is tanned and the fish flakes.

Enjoy!

Tuesday, November 23, 2010

Vanilla Glazed Sweet Potatoes


This is my favorite way to make sweet potatoes because it is way more flavorful than the marshmallow covered dish.  People who don't care for sweet potatoes, love this dish because it is different and very flavorful.  Please note, the picutre above is the uncooked dish, and my potatoes were runnier and mushier (is that a word?) than normal.  I'm hoping that the dish doesn't turn out too runny.  This is the first time this has happened.  Oh well, it will taste wonderful regardless of runniness.  Enjoy!

Vanilla Glazed Sweet Potatoes
2 cans sweet potatoes, drained
1/4 c butter
1/4 c brown sugar, firmly packed
1/2 tsp salt
Zest from one orange
Juice from zested orange
1/4 tsp black pepper
1 tbsp vanilla
1 c pecans, chopped

In a small pot, melt the butter over low heat.  Add the brown sugar, salt, zest, orange juice, black pepper, and vanilla.  Allow to simmer until all the sugar is dissolved. 


Place the potatoes in a casserole dish and pour the sauce over them.  Sprinkle with the chopped pecans.  This dish can be made ahead of time without any hassles.  If you don't want to cook it now, cover and refrigerate until time to cook.

Pre heat the oven to 375 degrees.  Place potatoes in oven and allow to cook until the potatoes are hot and the sauce is bubbling - about 20-30 minutes.  If the dish is cold, this will take about 15 minutes longer.

Enjoy! 

Ultimate Turkey Brine

Turkey is wonderful meat when it is not over cooked and dry.  I've learned that brining a turkey helps prevent the turkey from drying out when cooking, and provides it with additional flavoring.  It is simple to brine a turkey and definitely worth it.  Three warnings about brining turkey.  One, brined turkeys don't make as many drippings for gravy as a non brined turkey (the moisture stays in the meat), so make preparations for the gravy using something other than the turkey drippings.  Two, it takes about 30 minutes to an hour less time to cook a brined turkey, depending on the size of the bird.  Place a thermometer in the bird and watch it carefully when it starts nearing 180 degrees.  And three, if you plan to deep fry a turkey, be prepared for the skin to appear burned.  The sugar in the brine contributes to this.  Rest assured that the meat is not burned.  Also, if you deep fry a turkey, make sure you have completely dried the turkey before lowering it into the hot oil.  No one wants to become a Darwin Award winner!

Ultimate Turkey Brine
1 1/2 c Kosher salt
1 1/4 packed brown sugar
Zest from 2 oranges
1 tbsp black peppercorns
10 whole cloves
5 sprigs thyme
1 large sprig rosemary
4 leaves sage
4 cloves garlic (whole and peeled) - optional
64 oz apple juice
1 gallon iced water

In a pot, combine the salt, sugar, zest, pepper, cloves, rosemary, thyme, sage, garlic, and apple juice. 


Bring to a simmer.  Let brine simmer for about 30 minutes.  Remove from heat and let cool.

I like to funnel the brine back into the apple juice container and place it in the refrigerator overnight.  I think this lets the flavors mingle.

To brine the turkey, either in a brining bag, a 5 gallon bucket, or an insulated 5 gallon water container (like those seen at sporting events or construction sites), pour all the brine solution and 1 gallon iced water into the container.  Carefully add the turkey.  If you use a brining bag, make sure you place the bag in a roasting pan, or other large container, in case the bag breaks.  If you use a 5 gallon bucket, or the insulated container, and live where it is cold (but not much below freezing), place the covered bucket outside.  If you are using a brining bag, place the turkey in the refrigerator.  My in laws have a walk in refrigerator, and we place the turkey there.  Let the bird brine overnight, for no more than 12 hours. 

Before cooking the turkey, completely rinse the inside and outside of the turkey and pat it dry.  Cook as you normally would and enjoy!